Canvases will always prove a useful tool to boost your workshop, should it be to reflect upon a customer-oriented solution, to practice design thinking or in many other situations. Some methodologies are, by essence, immediately adapted to the use of canvases (Customer Empathy Map, Business Model Canvas, SWOT…). Others may very easily be adjusted for that matter (De Bono’s hats, Customer Journey…). A canvas creates an overall sense of meaning by linking all the ideas to one another in a highly educational spatial display.
As the year comes to a close, Stormz is proud to present the new generation canvas: more flexible, agile and user-friendly. In this article, we will see how to (re)create a canvas for a Stormz workshop by using the example of the Value Proposition Design.
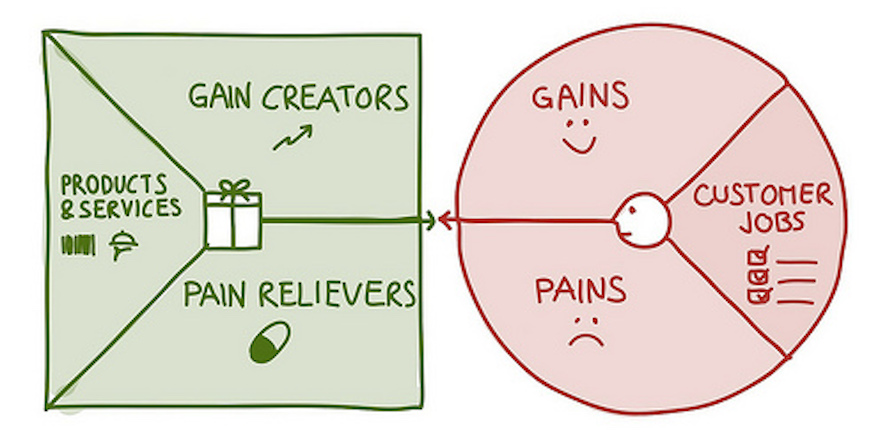 This canvas comprises 6 areas divided into two sets: the green square represents the product while the red circle stands for the client. Both sets are designed in a symmetrical fashion: the “gain creators” face the “gains” while the “customer jobs” face the “products & services”.
The canvas therefore illustrates how each individual cluster is simultaneously linked to a whole and to its opposite.
How to create a Stormz canvas?
Canvases are directly attached to a workshop and comprise columns, squares and dedicated areas. Each area showcases the content and customized version of the matching cluster. We have made available 13 canvases that you can customize in the settings menu and “canvas” tab.
These are the different steps involved in creating a canvas:
- Define your canvas according to your methodology.
- Set up your workshop and clusters.
- Create a canvas out of a standard model.
- Customize your clusters.
- Incorporate your canvas within the workshop’s sequencing.
- Facilitate your workshop with a canvas.
You should therefore start by defining clearly what kind of canvas you need. Don’t hesitate to sketch out your canvas in writing or to use a tried methodology. In this article, we will recreate, step by step, the Value Proposition Canvas within a Stormz workshop.
1 – Set up your workshop and clusters
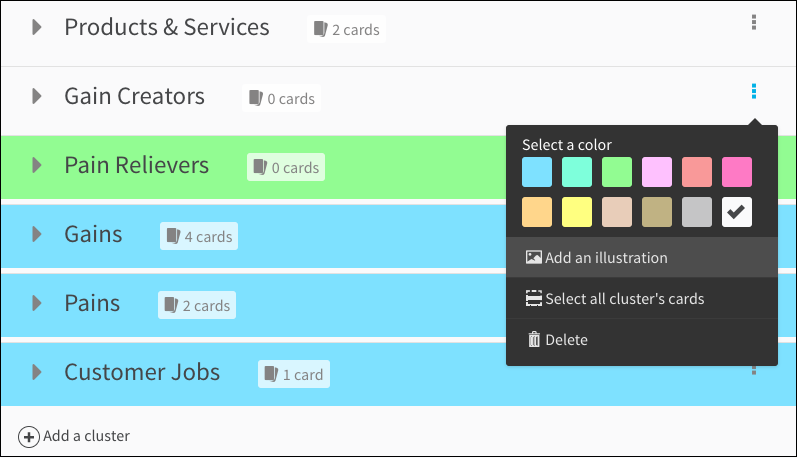
First, you will need to create your workshop and include a step with the authorization to add new cards and visualize canvases. Then, from the card view, create the clusters matching with each area. You can add colours and illustrations as of now, or do it after you created the canvas.
2 – Create a canvas from a standard model
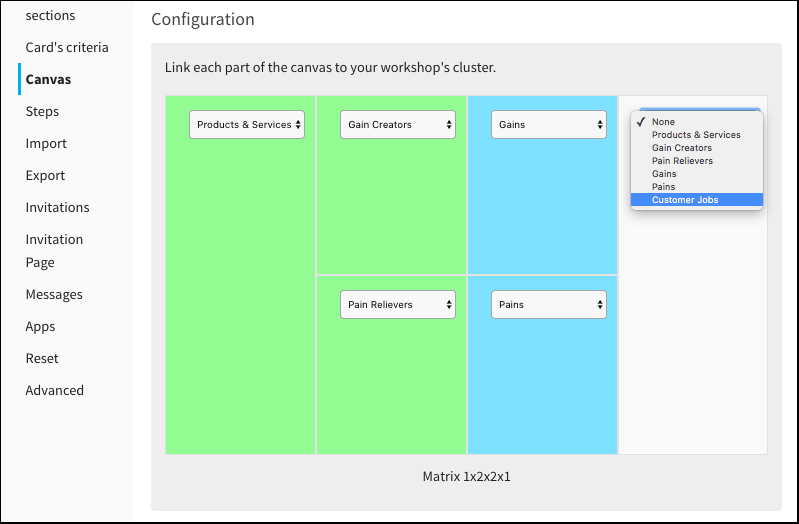
In the “canvas” tab of your workshop’s settings, you can choose à standard model out of 13 canvases at your disposal. We will use the 1x2x2x1 matrix, in many ways similar to the Value Proposition Design layout. Once the canvas is created, the clusters will automatically connect to different parts of the canvas. If the distribution isn’t satisfactory, you can simply change it in the settings
3 – Customize your clusters
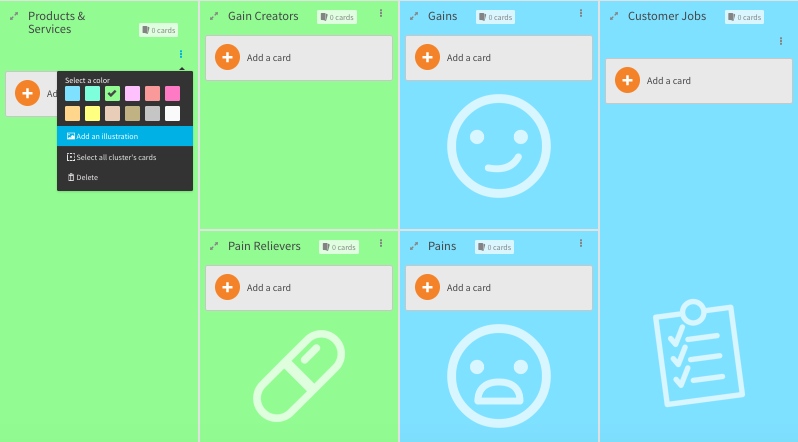
The canvas features the customized elements of the clusters: the picture, title or colour associated to each one of them will be visible on the canvas. You can illustrate or colour up every cluster directly from the Canvas view or Card view. Here, we chose white and transparent icons in the .png format with 72ppi. You can find a wide variety of icons for your canvases on the Noun Project website.
4 - Incorporate your canvas in the workshop’s sequencing
Your canvas is now ready! Make sure the participants are authorized to visualize the canvas in every step’s settings. Your workshop can, for instance, unfold according to these following steps:
Step 1 – Participants post their contributions while only being able to see their own cards.
Step 2 – Participants vote on each part’s best contributions.
Step 3 – Show the results depending on each card’s score so that the most relevant contributions stand out.
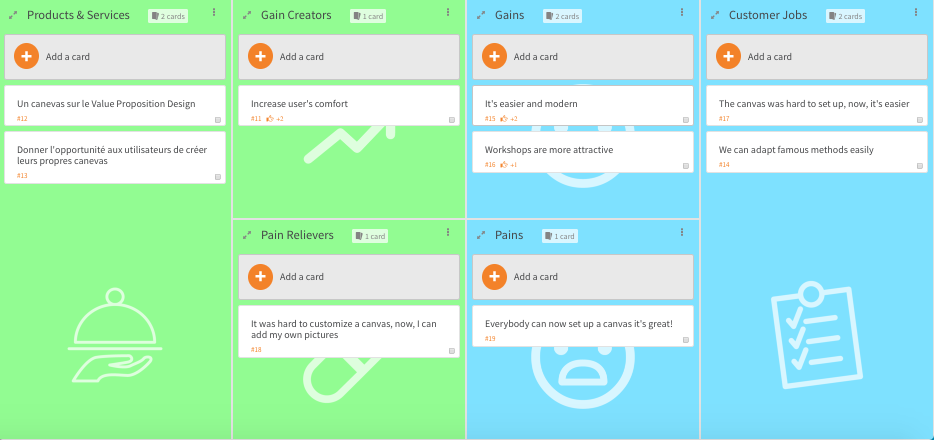
5 - Hide and reveal different areas of the canvas
You can choose, at all time, which cluster, and therefore which area of the canvas, can be seen by the participants. You only need to change the display and view synchronization options.
For example, you can first choose to show only the blue clusters (representing the client) and reveal the whole canvas afterwards. You can also use the different steps to set the parts you would like to reveal depending on how the workshop unfolds.
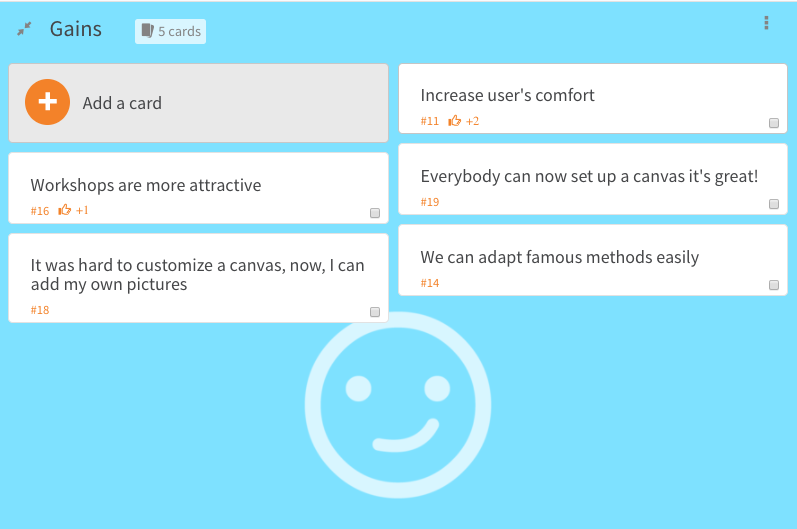
Last but not least, you can also enlarge the size of each area of the canvas by clicking on the arrow in the top-left corner. This feature increases the user’s comfort, even on small screens.
 There you have it! That’s all you need to know about canvases! Don’t hesitate to send us your best canvases or ask for our help ;)
Happy Christmas!
