
After having facilitated hundreds of workshops over the last four years, I am now certain of the following: the most productive sessions are those which combine different tools and various techniques and methodologies.
You will learn, in this article, about the template of a workshop to conceive low fidelity prototypes and then assess and improve them thanks to Stormz’ unique technology.
I facilitated, with several clients, different versions of this workshop and used it during the sessions of the facilitators’ conference in Moscow and of CREA Conference in Italy. Isabelle wrote about it in a previous blog post.
Where can I find the template?
This template, called “Combine prototyping with Stormz”, is available in the Stormz’ app: you can select it from the list of templates when you create your workshop or find it in the list of in-app templates.
A 3-step workshop
This collaborative workshop is divided into three main steps.
- Phase 1. Ideation: pure divergence to generate as many ideas as possible which will fuel step n°2
- Phase 2. Prototyping: participants converge to prototype a limited number of solutions.
- Phase 3. Assessment: prototypes will be assessed and collectively enhanced and improved.
Phase 1. Ideation (with or without Stormz)
I use a fairly simple technique to address two issues: what can we do to aggravate the problem & what can be done to improve it?
 But this is just an example. You are free to choose more sophisticated creative methodologies. You can use one of Stormz’ creative templates or one of your own favourite low-tech tool. As long as it helps participants generate as many ideas as possible.
Phase 2. Prototyping (without Stormz)
At this point, participants should gather in small groups and use the ideas generated in the previous step to converge towards a solution.
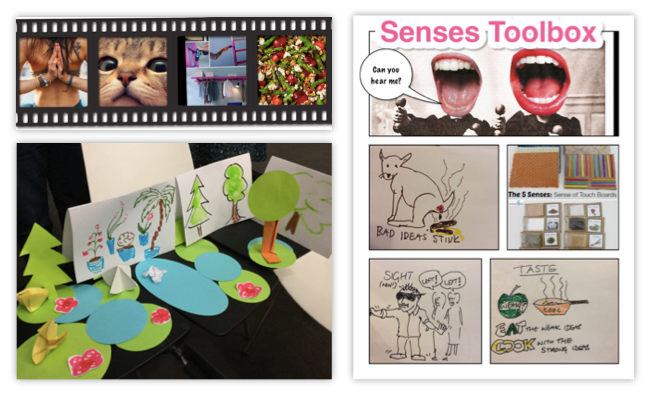
They will then have to create a low-fidelity prototype which embodies this solution:
- a drawing, a map or a diagram
- a story-board
- a miniature model (made out of paper or other materials)
- a Lego mock-up
- …
 Once the prototype is complete, it will be digitalized and attached to a Stormz card. Ask the participants to add a name and short description too. Depending on how much time you have, they can also attach a text, a spreadsheet or a more detailed description of the concept.
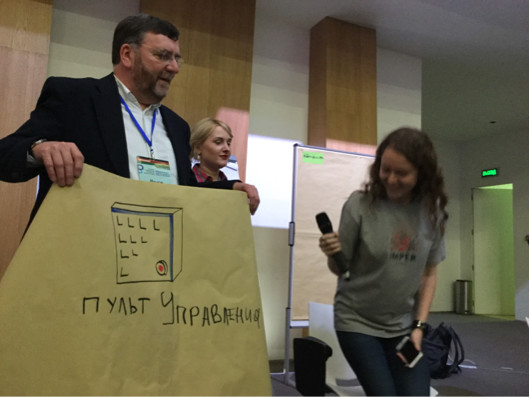
Each group will then present their solution to the whole room.
Phase 3. Assessment (with Stormz)
This step is, unfortunately, often neglected. It will however enable you to express the solutions’ high potential and transform them, as a group, into more robust concepts.
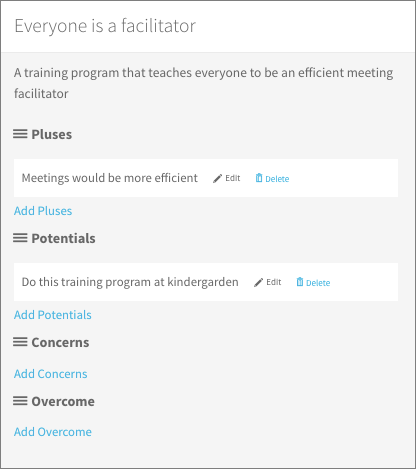
First, participants will “enhance” other groups’ solutions. In this template, I use the PPCO (Pluses, Potentials, Concerns, Overcome), but you can use the framework you like best.
 Thanks to these improvements, each group will then have the opportunity to improve its own prototype and bring forth a second iteration.
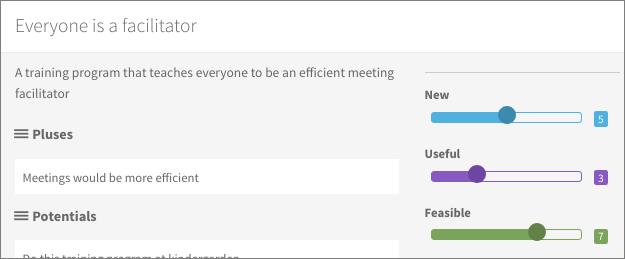
Finally, participants will assess the strength and quality of these concepts by using the multi-criteria assessment feature. In this example, I use the NUF (New – Useful – Feasible), but you can also use the criteria which suit you best.
 With the results of these evaluations, you will be able to end the workshop by a group discussion on what should be done next.
Ready, set…
Do not hesitate to adapt this workshop to fit your needs. Keep in mind that it can perfectly be organized onsite or online, in small or large groups, during a few hours or several days…
Try it out and share your experience with us. Hope to talk to you soon!